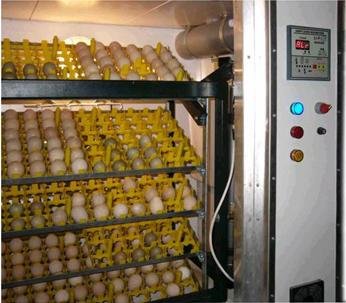
Clean an egg incubator between completed batches by unplugging it, separating the manufacturer-approved washable parts from the electrical assembly, removing hatch debris, and following the model’s cleaning instructions. Use only compatible products as labeled, keep electrical parts dry, and let the permitted cleaned parts dry before reassembly. Check operation empty before setting the next eggs.
We may earn a commission when you buy through links on this page.
This guide concerns an empty incubator after the hatch has finished and chicks have been moved to their appropriate care setup. It is not a reason to interrupt a hatch or an instruction for deciding when chicks are ready to move. Resolve hatch-management questions through the relevant incubation guidance before beginning a cleanout.
Start with the model, not the cleaner bottle
Find the exact manual and identify the base, egg-turning pieces, water components, upper assembly, fan guard, heater, sensor, and any external pump. Mark what the manufacturer permits you to remove or wash. Parts that look similar across models may have different cleaning restrictions.
The Brinsea Maxi 24 EX USA manual, for example, says to disconnect mains power, keep electrical parts dry, and avoid immersing the top. It identifies washable components and prohibits dishwasher cleaning. These are instructions for that model, not permission to submerge another incubator’s base or lid.
Set out the required brush, cloths, approved cleaning product, and a place for cleaned parts. Keep small fasteners in a labeled container if your manual calls for user removal of a guard. Do not begin dismantling the control assembly because a video of another model shows exposed wiring.
Keep the wet and electrical work separate
Remove the debris before the finishing treatment
With the unit unplugged and empty, remove shell fragments, fluff, and loose material using the method your manual permits. Take out only the designated removable parts. Separate disposable items from reusable ones rather than putting everything into a wash basin together.
For the Maxi 24 EX, the manual identifies the egg quadrants and base for its specified wash-and-rinse process. It also says not to reuse its hatching mats. That is a useful reminder to check each component’s status: a part supplied in the box is not necessarily intended to be washed for another hatch.
Do not use the heater or powered fan as a way to blow debris out during cleaning. Keep the unplugged electrical assembly out of splashes. Where the manual describes dry dust removal, follow that method instead of adding a spray cleaner to make the work look more thorough.
Match the cleaning product to the equipment
Brinsea’s incubator-cleaning guidance reinforces that cleaning methods and materials need to suit the equipment. Do not treat a generic bleach recipe found online as a universal instruction for every plastic, sensor, seal, or water system.
If the manual specifies a disinfectant, check the exact product label and intended use. Follow dilution, contact time, rinsing, and drying requirements. Do not mix products or substitute an unapproved solvent because it evaporates quickly. Cleaning away debris and completing a labeled disinfecting process are separate tasks.
If you are cleaning after a suspected disease problem, ask a veterinarian or the appropriate poultry-health authority about the flock situation. A routine equipment cleanout is not a diagnosis, a guarantee against disease, or an instruction to reuse suspect eggs or contaminated materials.
Keep the electrical assembly on its own path
The most important distinction in this job is between washable parts and parts that must stay dry. Follow any permitted damp-wiping instructions carefully and prevent liquid entering electrical housings. A removable plastic guard does not establish that the fan or heater behind it is washable.
The official Brinsea video below demonstrates cleaning an Ovation 28/56 assembly. It is useful for seeing the separation between removable covers and internal components. Its screw layout and disassembly sequence belong to those Ovation models. Do not copy them onto a Maxi 24 EX or an unrelated incubator.
Use the video as a reference alongside the matched manual. If the equipment differs, a component is damaged, or the instructions do not identify an operation as user maintenance, stop and contact the manufacturer. Electrical repair is different from removing approved hatch debris.
Dry and reassemble with a parts check
Follow the cleaning and storage directions for drying. Do not close wet washable pieces inside the unit and treat the machine as ready for long-term storage. Brinsea’s incubator-storage guidance emphasizes cleaning and thorough drying before putting equipment away.
Account for the removable parts before reassembly: egg-turning pieces, guards, water-system components, seals, and any other parts listed for your model. Check orientation against the diagram. A fan guard or water guard refitted incorrectly can create an operating problem even though the part looks clean.
Keep a short maintenance note with the model, cleanout date, product used, parts replaced, and anything that needs attention. If you found damage, record it as unresolved rather than hiding the note under “cleaned.” Do not use damaged equipment for the next batch.
Check the empty incubator before adding eggs
Once the unit is fully reassembled and ready under its instructions, perform the manufacturer’s pre-use checks without eggs. Check the required operating functions, turning setup, and water system rather than only confirming that the display lights up. Use the manual’s setup and stabilization procedure; this guide does not invent one universal test duration.
For example, an incubator may heat normally after cleaning while the turning pieces have been fitted incorrectly. The empty check should include the applicable turning function, so that error is found before the planned eggs are loaded. Likewise, a powered humidity system needs its own specified setup rather than a visual check of the reservoir alone.
Our incubator-sizing guide explains why egg size and supplied turning parts affect the planned batch. Verify that the parts you cleaned and reinstalled are the ones needed for your next batch, not a different tray arrangement from the same product family.
If replacement equipment is necessary, compare maintenance access as well as capacity in our egg-incubator guide. Plan the separate chick-care space too; adult-coop dimensions in our space-planning guide do not define suitable brooder conditions.
Common questions
Can I wash the whole incubator in a sink?
No general permission follows from removable plastic parts. Follow the matched manual, keep electrical parts dry, and wash only components it identifies as suitable for that process.
Can every incubator part go in the dishwasher?
No. The cited Maxi 24 EX manual prohibits dishwasher cleaning. Other models need their own instructions; appearance and material alone do not establish compatibility.
Is the incubator ready when the display turns on after cleaning?
Not by that check alone. Reassemble correctly and complete the manufacturer's empty pre-use checks, including applicable turning and water-system functions, before adding eggs.
Cover photograph by Vyperx1, Public domain, via Wikimedia Commons. Contextual photograph; it does not identify a recommended product or endorse the installation shown. Original planning diagram by Backyard Henhouse.
