Plan a predator apron as a continuous ground-edge barrier attached to the coop or run, with its outward extension, joints, corners, and gate threshold worked out before cutting wire. A loose strip beside one wall is not a complete plan. Choose a construction detail suited to the site and the animals you are trying to exclude; no single width or surface treatment guarantees protection everywhere.
We may earn a commission when you buy through links on this page.
The first drawing should show the whole perimeter. Include where the mesh meets the wall, how it turns corners, what happens at the entrance, and any existing slab or foundation. The objective is to avoid a weak transition between otherwise separate pieces of a barrier.
Distinguish the apron from a buried vertical wall
A ground skirt or apron extends outward from the base of an enclosure. A buried L-shaped barrier includes a downward section and an outward return. Those related arrangements should not be reduced to one interchangeable measurement: depth, outward width, attachment, and the way the outer edge is retained are separate details.
University of Florida Extension's backyard-chicken guide describes a buried L-shaped perimeter barrier for stationary coops, with a 12- to 18-inch burial depth. the predator-proofing presentation hosted by the University of Minnesota illustrates an outward L-shaped wire arrangement and a 12-inch trench. These are published construction examples, not evidence that every surface apron should be a particular width.
If you are following a builder’s surface-apron design, keep that design’s outward dimension, attachment and ground-retention instructions together. Do not take the burial depth from one diagram and relabel it as the skirt width in another. If a needed detail is absent, resolve it before treating the barrier as complete.
Follow the barrier through the ground transition
Walk and measure the complete boundary
Measure each wall segment and draw the corners, posts, openings, steps, and adjoining surfaces. Check whether the enclosure sits on level ground or crosses a slope. Record where water moves after rain and where routine foot or equipment traffic passes beside the run.
At each segment, identify the actual base member or other specified support for the mesh. Look for deteriorated material, gaps behind trim, or a junction that cannot be reached for fastening and later inspection. A ground skirt does not repair an unsound frame above it.
Keep the drawing specific enough to locate every join. A simple rectangle on paper can conceal a gate recess, an added nesting compartment, or a step in the foundation. Those changes matter to both the amount of material and the continuity of the barrier.
Calculate coverage separately from the final cut list
For a hypothetical 10-by-15-foot rectangular run, the straight perimeter is 2 ×(10 +15) = 50 feet. If the chosen design used a two-foot outward strip, straight-run coverage would be 50 × 2 = 100 square feet. Two feet is an arithmetic assumption here, not a general apron-width recommendation.
That 100-square-foot figure is not the finished purchase quantity. Corners, specified joins, cuts around obstacles, attachment allowances, and the entrance can change the material needed. Draw the actual pieces and use the selected design’s joint detail before counting rolls.
Our hardware-cloth comparison separates nominal roll width, length, mesh description and coating information. Gross roll area does not establish that every square foot can be installed as the required pieces. A cut that removes a needed attachment edge may waste more useful material than the area calculation suggests.
Resolve the wall connection and the joins
Use the attachment method specified for the actual frame and mesh. The connection at the base is part of the barrier; placing wire near the wall is not the same as retaining it to the structure. Do not infer a universal screw, staple or spacing requirement from a shopping photograph.
Where two pieces meet, follow the chosen construction detail for support and fastening. A loose overlap can leave a movable edge even when the strips cover enough area on paper. Work out corners as deliberate pieces rather than cutting away the difficult section and assuming nearby ground will compensate.
For the material choice itself, our hardware-cloth sizing guide explains why opening size and wire description are different decisions. An outward extension intended to address digging does not make a large opening in the wall above it smaller.
Give the gate threshold its own detail
Open and close the gate through its normal travel and draw the threshold in both positions. Include hinge-side clearance, the latch-side edge and any slope or uneven ground below. The entrance should remain practical for the equipment used during ordinary care.
An apron stopping at the hinge post and restarting beyond the latch post leaves the entrance as a separate unresolved area. Choose a threshold arrangement that works with the complete enclosure design. Do not assume that tightening the gate latch repairs an open route beneath the gate.
If there is a removable panel, cleaning access or an automatic pop door near the ground, check that the new barrier does not obstruct its operation. Retention and sharp-edge protection also need to remain suitable when doors move. Solve those interactions before birds return to the finished area.
Check the ground work before starting
In the United States, arrange utility locating through 811 before digging and follow the applicable instructions for the work. Enbridge's safe-digging guidance applies that precaution even to small excavations. Do not assume that a shallow trench beside an existing building has no buried services.
Keep the work area and cut wire clear of the flock and ordinary household traffic. Use tools and handling protection suitable for the material, following their instructions. A planning article cannot establish the safe excavation or attachment method for every structure and site.
Consider drainage and access together with the barrier detail. A new edge or a change in ground covering should not be allowed to hide a water-entry problem or create an uninspected trip or cutting hazard. If the chosen detail cannot be installed as designed at a particular transition, revise the plan rather than leaving the gap concealed.
Inspect the completed perimeter as a continuous route
After the work, follow the base all the way around the enclosure. Check the wall connection, each join, corners, threshold, neighboring foundation and outer retained edge according to the design. Look for loose sections, exposed cut ends and a point where ordinary movement can pull material away.
Check the enclosure above the apron too. Our hardware-cloth versus chicken-wire guide explains why containing a bird and excluding an animal are different jobs. A completed ground skirt does not establish that the roof, walls, doors and other openings are suitable.
Retain the drawing and the actual material and fastening details for future maintenance. Recheck after relevant damage, erosion, ground movement or changes to the entrance. Repairs should address why a connection failed, rather than simply adding more loose wire beside the same damaged area.
Common questions
Is a two-foot apron always sufficient?
This guide does not establish a universal apron width. The two-foot strip appears only in a geometric example. Use a complete construction detail suited to the site, including its attachment, outward extension, joins, edge retention and entrance arrangement.
Is burial depth the same as outward apron width?
No. A buried L-shaped detail can include both a downward section and an outward return. Published burial-depth examples should not be relabeled as the width of every surface skirt. Keep the dimensions and method from the chosen plan together.
Can the apron stop on either side of the gate?
Treat the threshold as its own part of the continuous barrier. Strips ending beside the posts do not resolve the route below the moving gate. Choose a threshold detail that fits the enclosure and lets the gate and care equipment operate as intended.
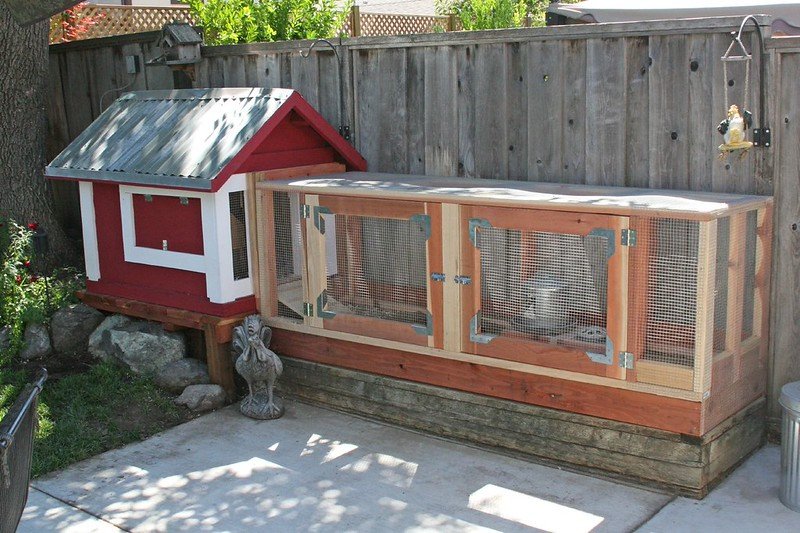
Cover photograph by Allan Hack, CC BY-SA 4.0, via Wikimedia Commons. Contextual photograph; it does not identify a recommended product or certify the installation shown. Original planning diagram by Backyard Henhouse.
