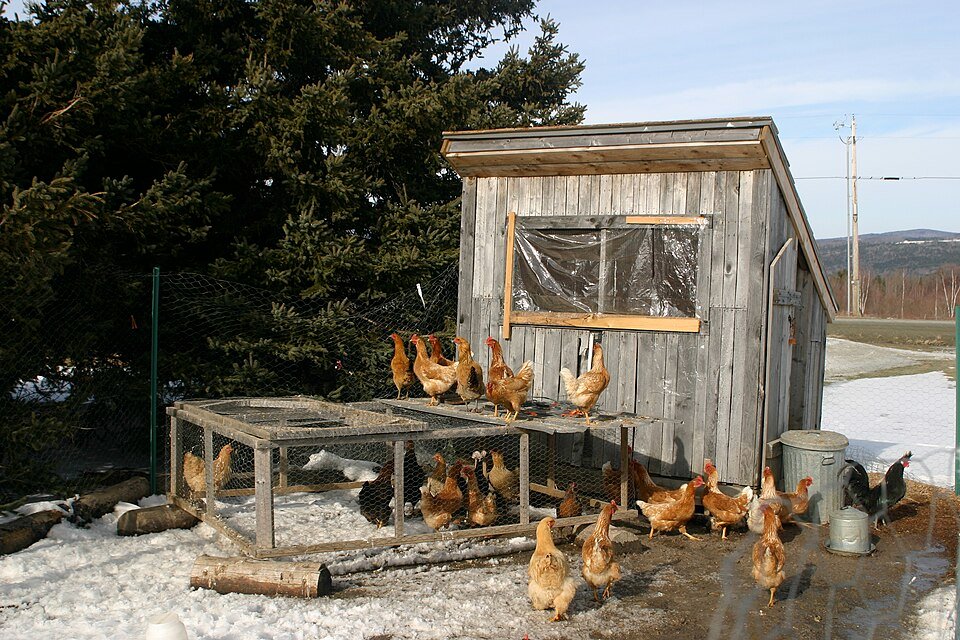
Winterize a chicken coop by repairing weather leaks and drafts, preserving ventilation, keeping bedding dry, checking roosting space and maintaining access to unfrozen drinking water. Do not seal every opening to hold in heat. A winter plan must manage moisture and air quality as well as cold weather.
We may earn a commission when you buy through links on this page.
Prepare for winter
- SHELTERWeather repairs
- AIRKeep ventilation
- CAREWater + bedding
This guide is for adult backyard chickens, not brooding chicks. Breed, condition, local temperatures and the enclosure affect what the flock needs. Decide on supplemental heat with local poultry extension or your veterinarian rather than assuming every coop needs a lamp, or that no flock will ever need help.
Walk around the coop before cold weather arrives
Inspect the roof, doors, windows and joints in daylight. Make a repair list while you can see the openings and reach them safely. Separate damage that admits rain or wind from intentional ventilation. Blocking both indiscriminately can leave you with a tighter building and a different problem inside.
University of New Hampshire Extension emphasizes protection from precipitation and wind while retaining ventilation. The practical implication is to identify each opening’s purpose before covering it. Ask the coop manufacturer about suitable repairs if its construction or weatherproofing is unclear; do not attach a cover that prevents a door from latching.
| Check | What to establish | Avoid assuming |
|---|---|---|
| Roof and joints | Rain and snow stay out | A fabric wrap repairs a roof |
| Ventilation | Air exchange remains available | All openings should be closed |
| Bedding and floor | Wet material can be removed | Extra bedding solves a leak |
| Water | A checking and backup plan exists | Powered equipment needs no inspection |
| Heat decision | Advice fits this flock and location | One temperature rule covers every coop |
Write down what each modification is intended to solve. “Rain enters this joint” is a useful repair description. “Make the coop warmer” is too broad to tell you whether you need a roof repair, a change in airflow or advice about the flock. Check the result after the next relevant weather event rather than assuming the repair worked.
Keep ventilation working
University of Minnesota Extension links air exchange and manure management with moisture control. It identifies condensation and an ammonia smell as reasons to increase ventilation and remove manure. Do not wait for a fixed cleaning date if you find those conditions.
Look at where the birds roost, where moisture collects and where air enters and leaves. Plan to keep ventilation functional without directing a cold wind onto resting birds. There is no universal vent size in this guide: the enclosure and flock need to be assessed together. A wrapped run or a covered window should not silently remove the only airflow route.
Record what you can observe without turning the inspection into a diagnosis. Are windows collecting moisture? Is bedding wet? Is an opening blocked? If birds appear unwell, seek veterinary advice promptly. More insulation is not a substitute for investigating a health problem.
Review bedding and usable space
Check for wet spots and manure buildup, especially in areas you cannot see from the doorway. Keep a workable removal route through winter weather. Stocking replacement material is helpful only if you can keep it dry and reach the area that needs attention.
Do not add layers indefinitely without a managed bedding plan. Check how the resulting floor level affects doors, feeders and the access to nests. This guide does not prescribe a universal deep-litter system or promise that decomposing bedding will safely heat the coop. Discuss that approach with local extension before relying on it.
If the flock will spend more time inside, revisit usable coop and run space. An advertised capacity based on regular outdoor access does not establish suitability for prolonged indoor confinement. Measure the spaces separately and keep the actual layout in view.
Inspect roosts and insulation
Check the roosting arrangement against the birds that will use it. Look for loose supports or a placement that makes a weather opening blow directly onto resting birds. If modifying the roost, allow for access and cleaning as well as the space occupied by the board itself.
If insulation is used, Minnesota advises enclosing it so birds cannot peck or scratch it and rodents cannot gain access. Ask how the proposed material will be protected and inspected before installing it. Insulation is one building component, not proof that a coop is safe in every winter condition.
Use the essential coop setup checklist to make sure seasonal changes have not compromised the ordinary needs of the flock. A cover that obstructs a latch or makes a waterer inaccessible creates an everyday problem even if it blocks the wind.
Plan for water and power interruptions
Include drinking water in the winter inspection. Decide who will check it and what happens if it freezes or equipment stops working. Do not treat a powered waterer as a substitute for checking the flock. Keep the product instructions available and verify the intended use and installation requirements before buying.
For electrical work, use a qualified electrician and follow the equipment instructions. Minnesota cautions against using extension cords as a permanent power supply to a coop. This article does not provide wiring instructions or approve a particular heating device. Water, bedding, animals and power require an installation suited to the actual site.
Why this guide does not give one heating threshold
The extension sources differ. Minnesota recommends supplemental heat below 35°F, while New Hampshire generally advises against adding it because of fire risk, while acknowledging exceptions. Presenting either as a universal rule would hide that disagreement and the importance of flock and location.
Take the details of your birds, enclosure and weather to local extension or your veterinarian. If heating is advised, choose equipment and installation appropriate to that recommendation and plan for a failure or outage. Do not improvise with an unsecured lamp, household heater or open flame around bedding.
Finish with a winter access check
Make sure you can reach the coop, operate its doors and inspect the birds during the conditions you expect. Keep the repair notes and equipment instructions together, with contact details for help. Arrange backup care if weather could prevent the usual keeper from reaching the flock.
When comparing a replacement enclosure, use the chicken coop buying guide to ask about construction, ventilation, usable space and access. “Winter-ready” in a listing is not a substitute for those details. A useful winter plan explains how the whole setup will be managed, not just which accessory was added.
Common questions
Should I close all the vents in winter?
No. Preserve ventilation while addressing drafts and weather entry. Moisture and air quality remain part of winter management.
Does every coop need a heater?
No universal answer is supported by the extension guidance discussed here. Sources differ; get advice matched to your flock, housing and location.
Can I run a coop permanently on an extension cord?
Minnesota Extension advises against that. Have a qualified electrician address the supply and follow the equipment instructions.
Is this a guide for newly hatched chicks?
No. It is for adult backyard chickens. Chicks need age-appropriate brooding conditions, which should be planned separately.