For a coop without an outlet, start with the RUN-CHICKEN T50 if its 8-by-10-inch opening and upward travel fit your wall. Choose a horizontal Omlet if a roof or brace blocks that travel. If you need to check or operate the door from town, the Omlet Smart is the pick here for Wi-Fi, with a meaningful difference between battery and plug-in operation. Compare the opening, the room around it, and how you’ll check that the door really shut.
We may earn a commission when you buy through links on this page.
Our picks at a glance
Start with the features that fit your setup.
Best starting point for a coop without power
RUN-CHICKEN T50

A battery-powered vertical slider for a wall with room above the opening.
- Opening
- 8 × 10 in
- Power
- 2 AA batteries
Best for Wi-Fi status and commands
Omlet Smart Autodoor
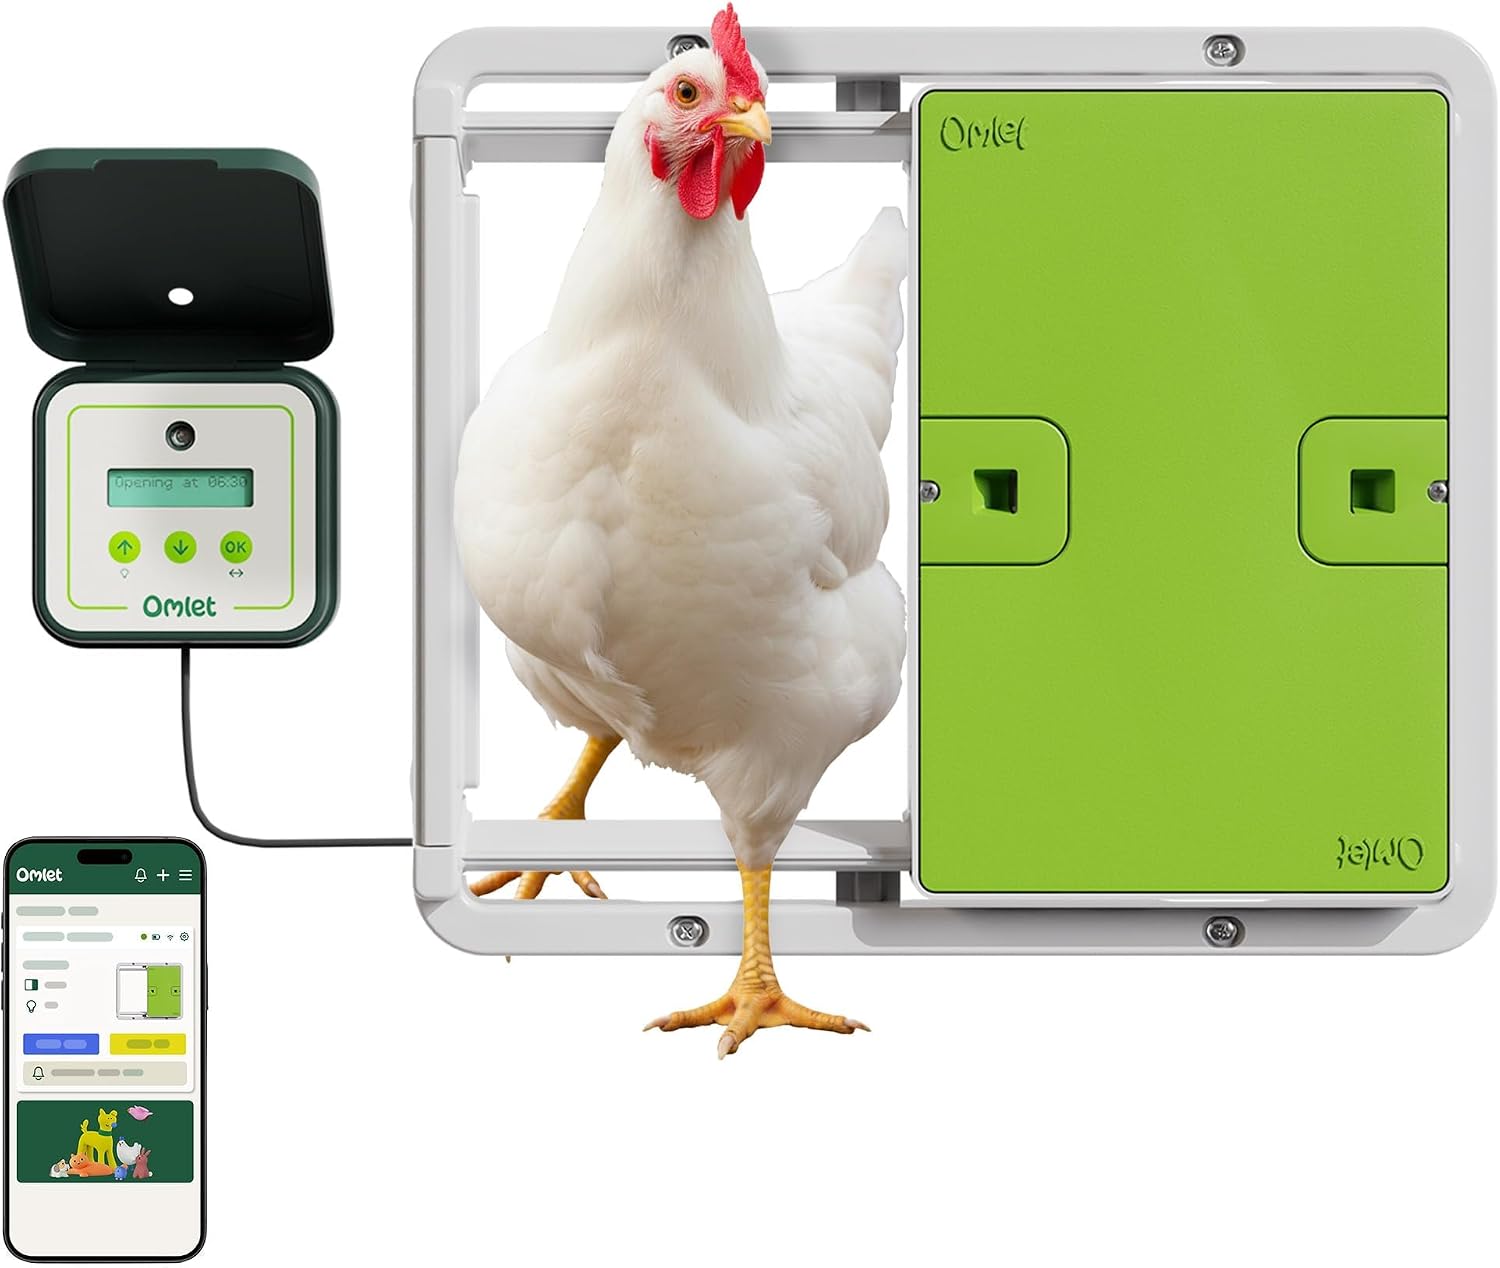
Choose it for Wi-Fi control if you have a usable signal at the coop. Plug-in power makes app commands more responsive.
- Opening
- 7¾ × 11¾ in
- Power
- 4 AA batteries or optional adapter
Also in this guide
- Omlet AutodoorBest for low headroom and on-site controls
- RUN-CHICKEN EternalBest for integrated solar
- FarmLite 12V Automatic Coop DoorBest for a powered coop with local controls
- OKKÖBI Coop Door LiteBest for a basic on-door timer
Automatic chicken coop doors compared
| Product | Power | Automatic and manual controls | Opening | Panel travel |
|---|---|---|---|---|
| RUN-CHICKEN T50 | 2 AA batteries | App setup, timer or daylight | 8 × 10 in | Up |
| Omlet Smart Autodoor | 4 AA batteries or optional adapter | Light, timer, local button or Wi-Fi app | 7¾ × 11¾ in | Sideways |
| Omlet Autodoor | 4 AA batteries | Light, timer or local button | 7¾ × 11¾ in | Sideways |
| RUN-CHICKEN Eternal | Built-in solar cell and rechargeables | App setup, timer or daylight | 8 × 10 in | Up |
| FarmLite 12V Automatic Coop Door | 12V supply; separate solar setup optional | Timer or light sensor | Approx. 8½ × 10½ in cutout | Up |
| OKKÖBI Coop Door Lite | 3 AA batteries | Timer or local button | 11 × 9.4 in listed | Up |
Six automatic chicken coop doors
01 / Best starting point for a coop without power
RUN-CHICKEN T50
Best for: An adult flock with a suitable pop hole, space above the door, and no outlet nearby.
- Opening
- 8 × 10 in
- Power
- 2 AA batteries
Why consider it
- Uses two replaceable AAs
- Vertical travel saves space to the left and right
- Timer and daylight-based scheduling on the linked app-capable model
Keep in mind
- Needs room above the frame for the raised panel
- An 8-inch-wide passage may be a poor fit for a larger adult bird
- The T50 name spans more than one control generation
Read the full analysis of RUN-CHICKEN T50
The gray T50 linked here is the app-capable listing. RUN-CHICKEN’s gray T50 page specifies an 8-by-10-inch pass-through, a frame about 9.5 by 14 inches, and a fully open height of about 24 inches. Check the clearance drawing that ships with your unit and allow the full upward travel before fixing the frame under a brace or overhang.
The listed model uses two replaceable AAs and can be set to a timer or daylight-based routine through the app. T50 is a family name, and controls can vary with the drive unit. Verify the unit and its instructions when it arrives, especially if you are reusing an older manual or buying a replacement motor. Treat phone setup here as a way to program the door at the coop, and look to the Omlet Smart if your buying decision depends on Wi-Fi away from home.
The manufacturer describes a stop-and-reverse response to resistance, followed by a retry. Leave the rails and sill clear and watch a full close during commissioning. If the door reopens because something is in the track, the coop is still open until the panel seats fully.
Key specs: 8 W × 10 H in passage, aluminum vertical panel, two AA batteries. Current gray model lists about 24 in fully open.
02 / Best for Wi-Fi status and commands
Omlet Smart Autodoor
Best for: A keeper who wants status on a phone and has Wi-Fi and room for a side-sliding frame.
- Opening
- 7¾ × 11¾ in
- Power
- 4 AA batteries or optional adapter
Why consider it
- Wi-Fi control and door-status notifications
- Locally stored schedule can run through a connection loss
- Documented mechanical opening procedure
Keep in mind
- Battery operation can delay remote commands up to about ten minutes
- Optional mains adapter is a separate purchase for the linked listing
- Horizontal frame takes room beside the opening
Read the full analysis of Omlet Smart Autodoor
The complete Smart Autodoor has a horizontal frame and a separate controller. Use the controller at the coop for time, light or manual operation, or connect it to Wi-Fi for app commands and status. Omlet’s support page says the schedule is stored on the controller, so loss of Wi-Fi alone leaves the programmed operation running. The panel still needs power and a clear path.
With four AAs, Omlet says the connected control panel wakes to check in at ten-minute intervals. A remote command can therefore wait until the next check-in. Use Omlet’s optional mains adapter if a prompt Wi-Fi command is an important reason for buying this model. Check your phone’s Wi-Fi signal at the controller’s proposed location first, with the coop and run doors in their usual positions.
The manufacturer’s dimension drawing shows the opening separately from the roughly 19¼-by-16½-inch frame. Allow room for the frame on the selected side. Read the manufacturer’s mechanical release instructions so you can open the pop hole if the electronics are unavailable.
Key specs: Approximately 7¾ W × 11¾ H in opening, 19¼ W × 16½ H in frame, four AAs or optional Omlet mains adapter.

03 / Best for low headroom and on-site controls
Omlet Autodoor
Best for: A low wall with enough room to the left or right and no need for remote app controls.
- Opening
- 7¾ × 11¾ in
- Power
- 4 AA batteries
Why consider it
- Sideways panel suits some low walls
- Light and timer settings are available at the coop
- Manufacturer lists service parts and a manual for the non-Smart controller
Keep in mind
- Requires open space beside the pop hole
- Original local controller has no app or Wi-Fi status
- Linked listing calls for four AAs purchased separately
Read the full analysis of Omlet Autodoor
The standard Omlet uses a local controller to run on light level or at set times. Its horizontal frame lets you work around a low eave when the wall has clear space on one side. Omlet documents both control-panel variants and lists the same frame assembly for Smart and non-Smart versions. Follow the original Autodoor manual when locating the panel and cutting the opening for this bundle.
The linked battery-operated listing calls for four AAs. Place the panel where you can reach it, and remember that light mode uses the light that reaches the controller. If a recess or porch light affects the sensor, the timer gives you a direct way to set closing around when the flock returns.
If you are replacing an existing Omlet controller, Omlet’s parts and support page lists the controller separately. When buying a new installation, use the full door listing and check the accessories required for your type of coop or mesh.
Key specs: Approximately 7¾ W × 11¾ H in passage using the shared frame, horizontal opening, four AA batteries.
04 / Best for integrated solar
RUN-CHICKEN Eternal
Best for: A coop without an outlet, with usable light at the door itself and room for an upward slider.
- Opening
- 8 × 10 in
- Power
- Built-in solar cell and rechargeables
Why consider it
- Integrated solar charging with no separate panel or cable to mount
- Rechargeable batteries are supplied
- Timer and daylight-based routines in the listed app version
Keep in mind
- Solar cell has to stay where the door is mounted
- Requires clearance above the opening
- Manufacturer publishes inconsistent battery replacement intervals
Read the full analysis of RUN-CHICKEN Eternal
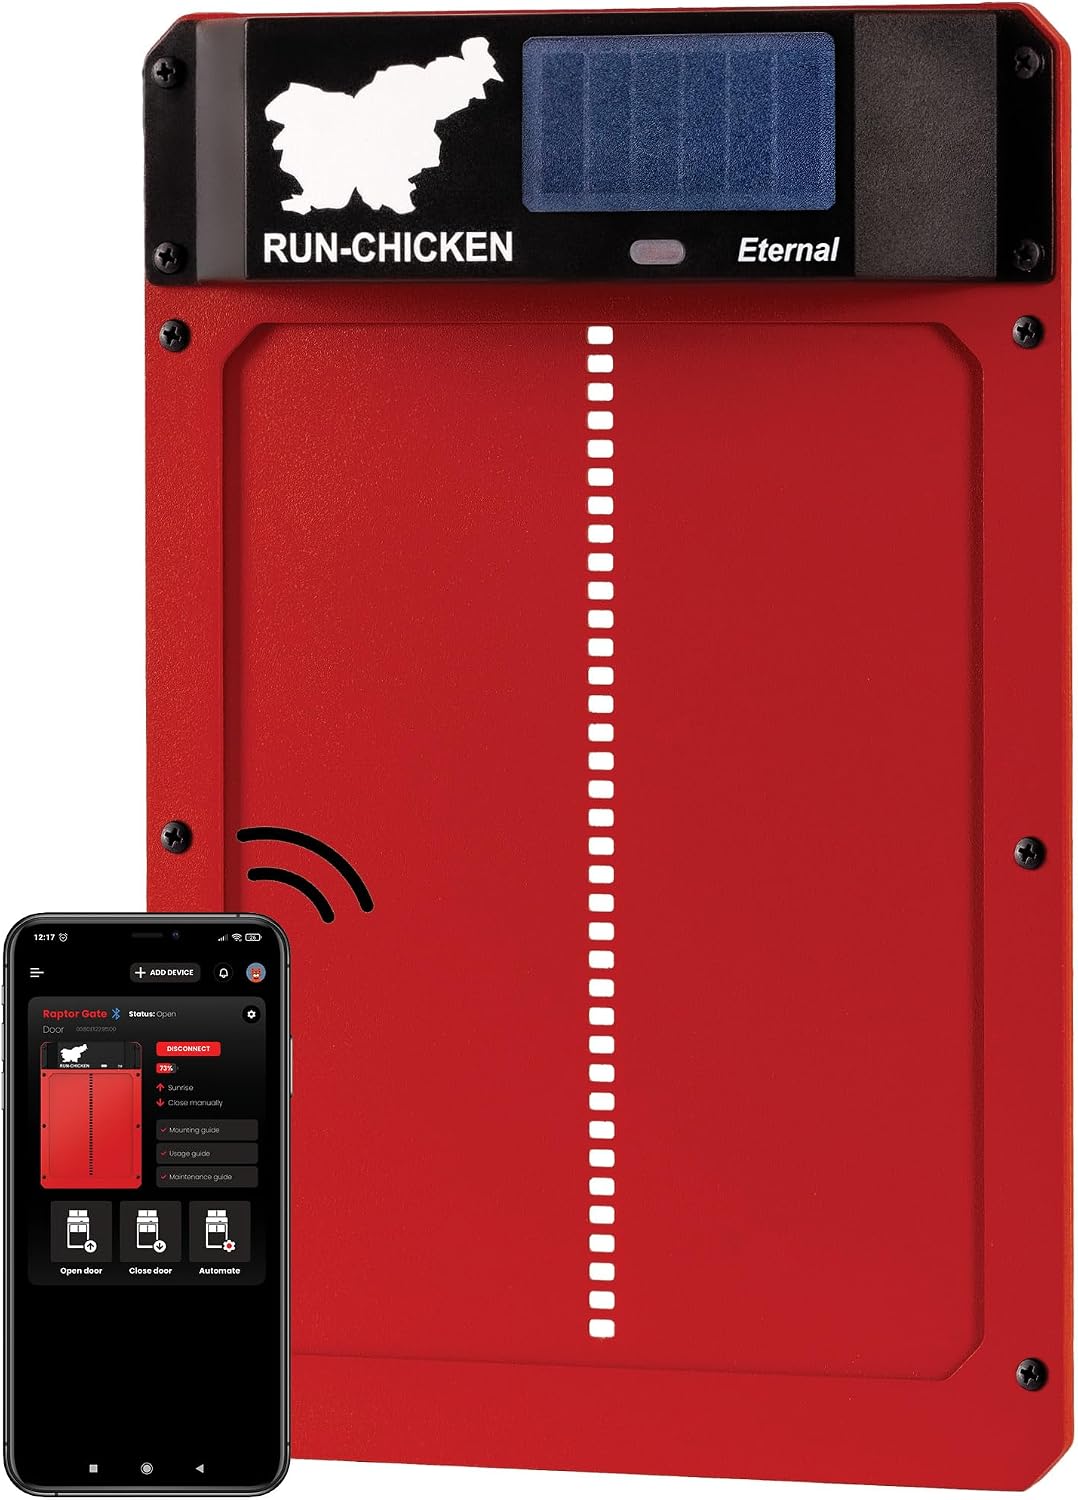
The red Eternal uses a solar cell built into the drive unit to recharge the batteries. RUN-CHICKEN’s model page specifies an 8-by-10-inch opening and about 24 inches fully open. Its installation suits much the same wall layout as the T50, with solar exposure added to the checklist.
Check where light actually reaches the motor cover. If your chosen wall is beneath a deep opaque roof, you cannot reposition this built-in cell like a separate panel. Choose a mounting location the manufacturer considers suitable, or use a different power setup rather than counting on an advertised runtime.
The linked red version lists app-based timer and sunrise/sunset operation. Check battery status periodically and follow the manufacturer’s instructions for the rechargeables supplied with your unit. Replacement intervals depend on conditions and the supplier’s documentation gives conflicting figures, so base servicing on the instructions and charge indicator for the unit you receive.
Key specs: 8 W × 10 H in opening, about 24 in fully open, integrated solar charging for the supplied rechargeable batteries.

05 / Best for a powered coop with local controls
FarmLite 12V Automatic Coop Door
Best for: A coop with power already available and enough height for a vertically moving door.
- Opening
- Approx. 8½ × 10½ in cutout
- Power
- 12V supply; separate solar setup optional
Why consider it
- Can use an existing power supply at the coop with the approved adapter
- Both timer and light-sensor settings
- Manufacturer provides infrared sensor setup and replacement parts
Keep in mind
- Solar equipment is separate
- Needs power cabling and upward clearance
- Published 8½-by-10½-inch figure is the cutout, so verify usable passage separately
Read the full analysis of FarmLite 12V Automatic Coop Door
FarmLite’s gray wired door combines an upward-moving panel with timer and light-sensor operation. The exact listing gives an approximate rough cutout of 8½ inches wide by 10½ inches high. Check the FarmLite installation instructions for the full frame, raised-panel clearance, and path of the cable before cutting.
The linked listing is sold as a non-battery primary-power model and specifies a separate 12-volt solar setup for off-grid solar. Plan around the standard supply where you already have power. If backup matters, confirm the current box contents and power-change procedure with FarmLite. The ability to attach another power source alone does not tell you what happens automatically when the main power goes out.
The listing describes an infrared sensor for the doorway. FarmLite provides sensor setup guidance and sells it separately as a replacement. Check the manufacturer’s setup procedure with the path clear, and keep the sensor and the track free of debris. Confirm the panel’s actual position after a fault or interruption.
Key specs: 12V door, approximate 8½ W × 10½ H in rough opening by the listing, timer and light sensor, infrared doorway sensor.

06 / Best for a basic on-door timer
OKKÖBI Coop Door Lite
Best for: A keeper who wants a simple fixed schedule and can adjust it at the coop.
- Opening
- 11 × 9.4 in listed
- Power
- 3 AA batteries
Why consider it
- LCD and buttons are accessible on the door
- Three AA alkaline batteries listed as included
- Fixed open and close times can be set locally
Keep in mind
- Timer needs adjustment as the flock starts roosting earlier or later
- Requires room above the frame
- Confirm which listed opening measurement is the width before cutting
Read the full analysis of OKKÖBI Coop Door Lite
The Raven Coop Door Lite is a vertical slider with three AAs, an LCD clock and local buttons. The linked OKKÖBI listing describes two operating modes. Timer mode opens and closes at set times, and manual mode lets you move the panel at the coop. Use the Lite’s own instructions. The brand’s solar door uses a different setup.
The listing quotes an 11-by-9.4-inch opening without labeling each axis in that figure. Confirm the clear width and height in the included instructions before cutting. In the main listing photo you can see the panel projecting above the control housing in its open position, so allow clear space above the frame and access to the display.
OKKÖBI describes a stop and retry after resistance in the listing for the Lite. That feature calls for the same practical check as the other doors here: keep the track clear and verify that the panel is seated after the scheduled close. A timer-only door makes the most sense when you can update the clock as the flock’s evening routine changes.
Key specs: OKCHI2487 Lite variant, 11 × 9.4 in advertised opening, three AA alkaline batteries, timer and local manual operation.
How we chose
We checked nine listings for model identity, box contents, power, operating modes, and fit. Six complete doors had an active purchase option and made the comparison. Sources include manufacturer manuals and support pages. The Coop Door Lite measurements come from the brand’s listing and need confirmation before cutting. This is a comparison of documented features and fit.
We excluded the Brinsea ChickSafe Advance listing marked CS020. It supplies an opener for a compatible existing sliding panel. The manufacturer sells a separate opener-and-door kit, so kit dimensions and hardware should not be assigned to CS020. The same distinction applies to the Omlet Smart control panel sold on its own. It can be a useful upgrade for an existing Omlet door, but the full Smart system is the one compared here.
Keeper discussions about closing modes and bedding in the track shaped two of our criteria. Can you set closing around the last hen’s return, and can you tell when the panel has seated after a fault?
How to choose an automatic chicken coop door
Measure the passage and the entire travel path
Measure the usable width and height between the solid sides and from the sill to the top of the opening. Check the current ramp against the proposed sill and see whether your largest hen already ducks or turns sideways at the existing opening. Write down the pass-through, the flat area available to fasten the frame, and the clear space for the panel when open. The table distinguishes the FarmLite’s rough cutout from the listed passage dimensions and flags the unlabeled measurements on the OKKÖBI listing. A drawing for the exact model is the right reference before cutting.
For example, a keeper with an 8-by-10-inch pop hole and 19 inches of clear wall height above its sill might see the T50’s roughly 14-inch frame and expect an easy fit. RUN-CHICKEN calls out about 24 inches for the fully open assembly. A brace at 19 inches can be in its way. An Omlet may work if there’s side room for its housing, but its published opening is around a quarter-inch narrower. Put the frame dimensions on painter’s tape and check the ramp lines up before deciding whether to move any wood.
For a horizontal slider, look for a stud, hinge, feeder mount, or trim beside the opening where the frame or panel needs to sit. Check the top where you’ll reach the controls. For a vertical slider, inspect above the frame with the coop’s people door, service hatch, and any swinging hardware in use. A roof overhang that looks clear from the ground can still obstruct the top of a fully raised panel.
Match the power source to the actual mounting spot
Replaceable AAs are easy to keep on hand. Check whether you can reach the battery cover while standing outside the coop, and find out whether the clock or schedule needs to be set again after a change. Access matters in winter when you may be clearing a ramp or opening the coop in the dark. Set a reminder to check the display or indicator, and follow the battery type specified in the exact manual.
An integrated solar cell makes for a tidy installation if the door face gets enough light. Stand at the proposed mounting spot during the afternoon and look at the shadows from the shelter, neighboring trees, and the run roof. In deep shade, the same location may be a better match for removable AAs. A model with a separate compatible solar setup gives you more placement options, with additional components to buy and locate. Compare the complete installed setup before choosing by price.
If there’s already power at the coop, compare the approved adapter and its cable route. The FarmLite makes sense where you can use its 12-volt supply. On the Wi-Fi Omlet, mains power also changes how quickly you can send a command. Decide how you’ll get the birds in or out following a power loss and where the instructions for that particular model will be kept.
Choose the closing trigger after watching your flock
A fixed timer is predictable when the birds return on a repeatable schedule. For the first few evenings, note when the last hen crosses the threshold. If five go in near 7:00 and one consistently goes in around 7:20, set the initial closing time after you’ve observed the last arrival and be there to confirm the result. Revisit the setting as daylight and habits change. Avoid giving up an essential evening check because the clock says the door should be shut.
A light sensor responds to its own location. A shaded wall can look dark earlier than the yard. Light from a garage or porch can reach a sensor while the run is already dark. If the same setting keeps closing too early or late, see what the sensor actually sees and try a fixed schedule while you work out the cause. App-based sunrise and sunset modes have model-specific settings, so check the instructions for the exact version before counting on a particular offset or trigger.
Check what failure looks like
A programmed close, a command accepted by an app, and a fully seated panel are three different observations. Find the closed position while you are at the coop. Read what the manufacturer says about a blocked door, an empty battery, and loss of Wi-Fi, and locate the local control and any documented manual release. A button that tells a powered motor to move depends on available power. Make sure you also have human access to the coop when the motor can’t run.
The door covers one opening. The coop still needs sound walls, a roof, secure service hatches, and protected vents. Check the frame and fastening surface around the pop hole as carefully as the motorized panel. University of Minnesota Extension’s small-flock guidance recommends a secure enclosed coop at night and a daily return at dusk.
Set up and check the door over the first week
Before cutting or tightening anything
Dry-fit the door at the intended height using its installation drawing. Check the ramp, fastener locations, and full path with the frame held level and flat as the manual specifies. If the wall is lapped or uneven, consult the mounting instructions before tightening a frame against it. Locate the control or battery compartment where you can read it, and make sure the ramp or inside bedding won’t rise into the bottom of the opening after routine maintenance.
At the first powered cycle
With birds and hands clear of moving parts, run the manufacturer’s setup cycle and watch the panel from open to shut. Look at the rails, the sill, and how the panel meets the frame. Use the manufacturer’s procedure for checking the obstruction feature, if it provides one. Keep the instructions for manually releasing or opening that model within reach. If anything rubs or stops short, correct the mounting or obstruction before running on a schedule.
At dusk and again the next morning
Observe the last hen go in, look at the panel fully closed, and check that the flock is accounted for. Check the next opening as well. Repeat after changing the schedule, moving a sensor, replacing batteries, or finding debris in the rails. A simple note with the date, battery change, and actual open and close times makes an intermittent problem easier to narrow down.
FAQ
Is a light sensor or a timer better for a chicken coop door?
Use a timer if the sensor faces a bright yard light or sits in deep shade and your flock normally returns on a predictable schedule. Use daylight mode where the sensor sees a useful change in light and verify where in that change the last hen comes in. Some doors use app-based sunrise and sunset schedules, so check whether the setting responds to local light, a calculated time, or a combination.
Will a Wi-Fi chicken coop door open if my internet goes down?
Omlet says settings are stored on the Smart Autodoor control panel, so the programmed operation continues through lost connectivity as long as the door has power and can move. App commands and updates depend on reconnection. Verify local controls during setup so you know what you can check from the coop.
What happens if the automatic door closes on an obstruction?
Responses vary. A door may stop, reverse, or try to close again. Always verify the actual panel position after a fault. An obstruction feature can leave the pop hole open when you’re expecting it to be shut, and it has no way to count the birds inside.
Can I keep my existing coop opening?
Often, if the useful opening, square mounting area, and full panel travel all fit the new system’s drawing. Tape the outline to the wall before ordering. If you want to keep the existing moving panel as well, look for a compatible opener and verify door weight, direction, and free movement against that opener’s manual.
Do I need direct sun for a solar coop door?
Check the manufacturer’s guidance for the panel, then assess the light at the actual installation spot over the seasons. A built-in panel goes wherever the door goes. A separate approved panel can sit in a better-lit position. Where neither will charge reliably, pick a door with an appropriate replaceable-battery or mains setup.
Can an automatic coop door keep predators out by itself?
It helps close the pop hole on schedule. Inspect the frame, other openings, and service latches, and keep counting birds and confirming closure each evening. Keep a way to reach the flock if a door is stuck or has lost power.
Which door should you buy?
Choose the T50 for a straightforward battery-powered install if your hens and the rising panel both fit. Choose the standard Omlet for a low wall with enough side room, or spend for the Smart controller if remote status and commands matter to your routine. Take the tape measure to the coop before you order, then plan to watch the first few complete evening cycles in person.
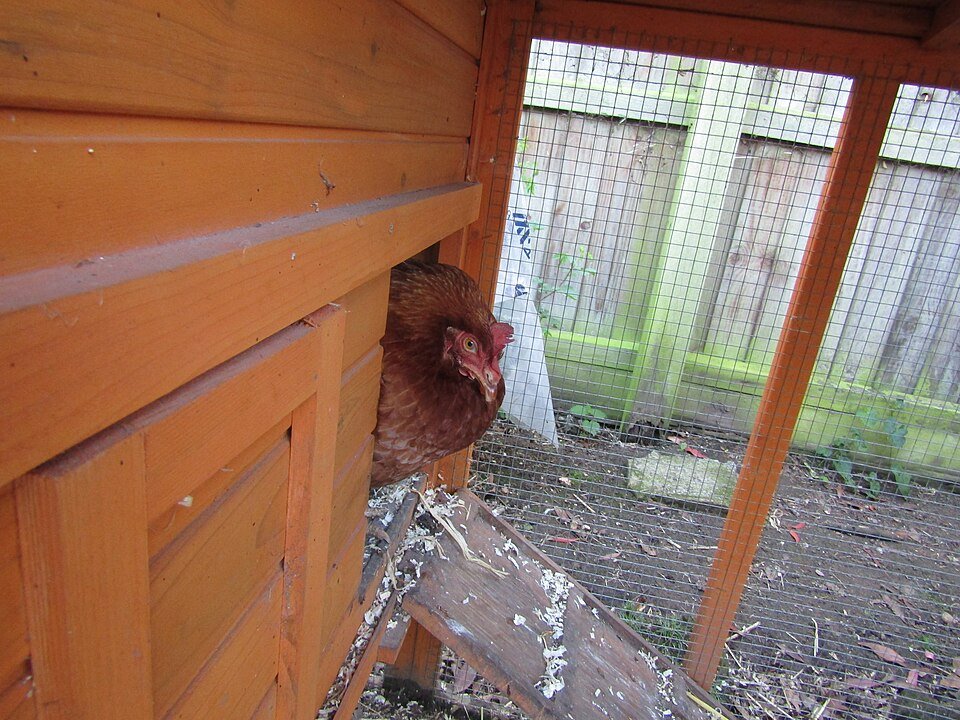
Cover photograph by Kolforn, CC BY-SA 4.0, via Wikimedia Commons.
