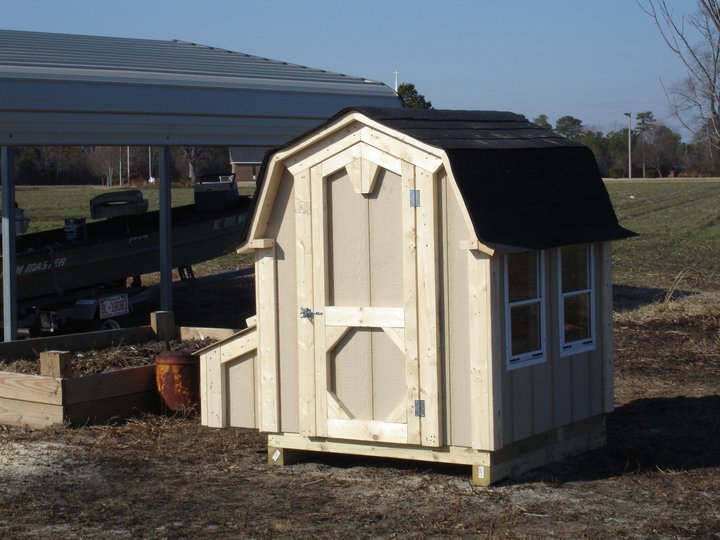
For a full chicken-coop cleanout, move the birds to a secure separate area, remove bedding and manure, wash and rinse suitable surfaces, apply a properly labeled disinfectant as directed, and let the enclosure dry before the flock returns. Routine spot-cleaning between cleanouts is a different job. Do not treat a spray over dirty bedding as disinfection.
We may earn a commission when you buy through links on this page.
Plan a full cleanout
- PREPARESecure the flock
- CLEANFollow the label
- RETURNDry + ready
Make the plan before opening a bag of bedding or mixing any product. You need a place for the birds, a route for removing material, equipment appropriate to the surfaces, and enough time for the label’s process and drying. A small coop can still take longer than expected if you cannot reach its corners or remove the fittings.
Decide which job you are doing
Routine care deals with the wet or soiled areas you find during daily checks. A full cleanout removes the accumulated material and gives you access to surfaces and fittings. Neither schedule should ignore a leak, a broken waterer or an unusual contamination problem simply because the next calendar date is later.
University of Minnesota Extension advises weekly cleaning of the coop and outdoor area, or as needed to control manure and odor, with a thorough cleaning at least annually. Use that as a baseline for planning inspections, not a promise that every flock and bedding system can wait the same interval. Record what you find and adjust the work to conditions.
| Task | Planning rhythm | Reason to act sooner |
|---|---|---|
| Check water and bedding | Daily observation | Leaks, wet spots or obvious contamination |
| Remove accumulated soiling | Weekly baseline; adjust to conditions | Manure or odor building sooner |
| Full cleanout | Plan a suitable empty-coop window | Flock change or a problem needing specialist guidance |
| Rodent cleanup | Separate contamination procedure | Evidence of rodents; do not sweep or vacuum |
If you find rodent droppings or nesting material, stop and use the separate precautions below. A suspected disease problem also needs veterinary or animal-health guidance; an ordinary housekeeping article is not an outbreak-response plan. Do not move exposed equipment or birds to another flock as a shortcut to clearing the coop.
Prepare the birds, equipment and work area
Choose a secure holding area appropriate to the weather and the flock. Make sure you can care for the birds there while the coop is unavailable. Do not depend on finishing in a few minutes. Keep clean supplies separate from the route carrying dirty bedding out, and identify where used material can be handled or disposed of appropriately.
Gather dedicated tools, suitable protective clothing and the cleaning-product instructions before starting. Check the care instructions for waterers, feeders, removable trays and the coop itself. A porous wooden surface and a washable plastic tray may not tolerate the same treatment. Disconnect electrical equipment safely and follow its instructions before work near water; do not spray live fittings.
Use the coop essentials checklist to account for the equipment you remove. A quick list of feeders, waterers, perches, trays and nest components helps prevent an essential item being forgotten when the flock returns.
Follow the cleanout sequence
The USDA APHIS cleaning guidance separates removing debris, washing, rinsing, disinfection and drying. Remove the ordinary bedding and manure so you can reach the surfaces. Clean off remaining dirt with methods appropriate to the material and your protective equipment. Avoid creating unnecessary dust; stop if the material requires a different contamination procedure.
Wash compatible surfaces with water and detergent, then rinse. Apply a disinfectant labeled for the intended poultry setting and purpose, following the exact dilution, application, contact time, ventilation and any rinsing instructions. Do not combine cleaning chemicals or substitute an internet dilution for the product label. If the label does not fit the job, choose another suitable product or seek guidance.
Leave the enclosure empty until it is fully dry and the label’s conditions for reuse are met. Keep the birds out during the process. Clean your dedicated footwear and tools and wash your hands when finished. These steps are distinct: a surface can look tidier after debris removal without having completed the rest of the process.
Rodent contamination changes the method
The CDC warns against sweeping or vacuuming rodent droppings, urine or nests, because that can put contaminated particles into the air. Follow its wet-disinfection and cleanup procedure for that material, with gloves and the specified precautions. Heavy infestations need additional guidance; ask your local health department or a qualified pest professional before disturbing them.
Do not use a leaf blower or dry broom to make suspicious droppings disappear. First identify the problem and keep birds and people away from the affected work area. Treat the cleanup and the entry problem as separate tasks: removing contamination does not seal the place where rodents entered.
Replace bedding only after the underlying problem is addressed
Before laying new material, inspect the floor and the areas around the waterer and doors. Mark any leak or damage needing repair. Replacing bedding over a continuing leak gives you the same job again without solving its cause. Keep the replacement bedding clean and dry until you are ready to use it.
Our guide to evaluating coop sand explains why a material label alone does not establish a workable bedding system. Whether you choose sand or another option, decide how it will be maintained and removed. A new bedding material should not be an unplanned experiment in a floor of unknown loading capacity.
Put the fittings back and inspect the completed layout before returning the birds. Confirm access to clean water and feed, the condition of the nests, the roost and the secure closure. Keep leftover chemicals out of the enclosure and stored as their labels require. Note the completion date and anything still needing attention.
Make the next cleanout easier
Record where the job slowed down. Was a tray too awkward to remove? Could you reach the floor under the nest? Did the doorway allow a container through? These are useful design observations, not reasons to claim one coop is universally easiest to clean.
Use those measurements when reading the chicken coop buying guide. Compare access openings, removable components and the route for lifting material out. A practical enclosure lets you inspect and maintain the whole interior, not just the parts visible in a listing photo.
Common questions
How often should I clean the coop?
Check conditions daily. Minnesota Extension gives weekly cleaning, or as needed, as a baseline and advises a thorough clean at least annually. Conditions can require earlier work.
Can I disinfect without removing bedding?
A full cleanout requires removal of organic material and cleaning before disinfection. Follow the label for the exact product and intended poultry use.
When can chickens go back inside?
After the enclosure is completely dry and all product-label conditions for reuse are met. Have a secure temporary area ready before starting.
Should I sweep up rat droppings?
No. CDC guidance says not to sweep or vacuum rodent droppings, urine or nests. Follow its contamination-specific cleanup instructions instead.