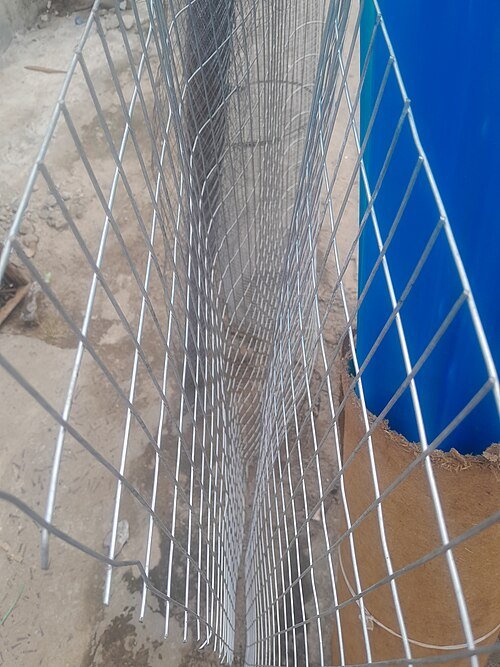
For a backyard chicken coop, start by comparing hardware cloth with 1/4-inch and 1/2-inch openings, then check wire gauge, attachment and the animals you need to exclude. Those fractions describe the openings, not wire thickness. A roll marked “1/2 inch” is not a complete predator-protection specification.
We may earn a commission when you buy through links on this page.
Check the whole barrier
- OPENINGMesh size
- WIREGauge / diameter
- INSTALLFrame + airflow
The goal is to choose a barrier for the actual opening in your enclosure. A small vent, a long run wall and a gap at the base present different installation questions. Work through them separately rather than buying one roll and assuming every part of the enclosure is now secure.
Mesh size and gauge answer different questions
Mesh opening tells you the size of the spaces between the wires. Gauge describes the wire’s thickness under the gauge system used by the supplier. Ask for both measurements, and request wire diameter if a listing is unclear. Do not compare products only by roll width, length or a photograph taken at an unknown scale.
Utah State University Extension recommends small hardware-cloth openings in the 1/4- to 1/2-inch range and warns that chicken wire is for containment rather than reliable predator exclusion. That guidance is a starting point for selecting the material, not a guarantee that a loosely attached panel will resist an animal.
| Term | Meaning | Question to ask |
|---|---|---|
| 1/4-inch or 1/2-inch opening | Space between wires | Which animals must this opening exclude? |
| Gauge / wire diameter | Thickness of the wire | Is the exact thickness documented? |
| Roll dimensions | Width and length supplied | Will the cut panels include attachment area? |
| Attachment and support | How mesh joins the frame | What do the material and frame instructions require? |
When the smaller opening matters
A rodent-proof construction guide hosted by Colorado State University Extension specifies 1/2-inch, 19-gauge hardware cloth for rat exclusion and 1/4-inch, 24-gauge cloth for mouse exclusion. These are rodent-exclusion examples. They are not a statement that the lighter mouse mesh is sufficient against every larger predator.
This is why simply choosing the smallest opening can miss part of the problem. A smaller opening addresses access through the mesh. Wire strength, the frame and the attachment address other ways a barrier can fail. For a high-risk location, discuss the whole assembly with local extension rather than translating one dimension into “predator-proof.”
An existing roll with openings larger than the guidance you are following should not be treated as equivalent because the wire looks substantial. Equally, a fine screen of unknown material should not be treated as hardware cloth. Write down exactly what the supplier is selling before deciding where it belongs.
Chicken wire and hardware cloth are not interchangeable
Chicken wire’s familiar pattern makes it easy to recognize, but recognition is not a performance check. Oklahoma State’s small-flock predator guide calls for hardware cloth or screen with openings smaller than an inch and emphasizes protective housing. A barrier that keeps hens inside can still leave access for animals outside.
Read the bill of materials when comparing a coop with an attached run. Ask which material covers the walls, vents and any floor openings. A listing that says only “wire mesh” leaves an important question unanswered. The answer may differ between parts of the same model, so request a detail image or specification for each area.
Our coop comparison can help you list those questions. It is better to leave a mesh specification marked “not confirmed” than to assign a gauge from a product photograph.
Measure the openings before measuring the roll
Make a list of the vents, windows, doors, service hatches and wall panels that need protection. Record each opening’s width and height and identify the solid material around it. Mark where hinges, handles or removable panels interrupt the perimeter. A rectangle on paper should include the way you will open and maintain it.
Then check the manufacturer’s fastening instructions and the support available in the frame. Allow for the attachment area specified for your installation rather than cutting a sheet exactly to the clear opening and discovering there is nothing left to fasten. This guide does not prescribe universal fastener spacing or a single fixing for every frame material.
For vents and windows, the rodent-construction guide warns that mesh smaller than 1/2 inch can substantially restrict airflow and can clog with dust or ice. Preserve adequate ventilation when choosing and sizing the protected opening, and inspect and clean the screen as needed. The smallest opening is not automatically the right ventilation design.
Wear appropriate hand and eye protection when working with cut wire, and handle cut edges according to the material instructions. Plan the finished edge so the birds and keeper do not contact exposed sharp ends. If structural work is needed, resolve that before adding the mesh rather than relying on the mesh to repair a weak frame.
Include the roof, base and closing edges
Inspect more than the wall panels. Utah’s guidance notes that animals may enter from below or climb into an open enclosure. A protected wall does not close a door gap, cover the top or stop access under the edge. Choose a complete design suited to the site rather than treating the roll as the entire solution.
For an apron or buried barrier, obtain a site-appropriate layout before excavating. Existing services, drainage and the construction of the coop affect how work should be done. Do not infer a universal installation depth from the size of the mesh; those are different decisions. Keep the design available for future inspections and repairs.
Close the coop as you would at night and work around its perimeter. Check the latch side, hinge side, bottom edge and every transition between materials. Look for panels that have come loose, damaged areas and gaps around fittings. Repeat the inspection after repairs or changes to the enclosure.
A purchasing checklist that avoids false certainty
Record opening size, gauge or diameter, material/coating, roll dimensions and installation instructions. Separately record where the panel will go, what supports it and which access problem it addresses. Missing information belongs on a question list for the supplier, not in an assumed specification.
When comparing prefab coop layouts, include whether you can reach every protected area for inspection. A panel hidden behind an inaccessible feature can be difficult to check later. The chicken coop buying guide should help narrow your options, while the verified specifications and site plan determine the final barrier choice.
Common questions
Is 1/2-inch hardware cloth mouse-proof?
Do not assume that. The rodent-construction guidance cited here uses 1/4-inch, 24-gauge mesh for mouse exclusion and a different specification for rats.
Is 1/4-inch mesh always stronger?
No. Opening size and wire thickness are different measurements. Check both, along with the supporting frame and attachment.
Can chicken wire replace hardware cloth?
Do not treat them as equivalent for predator exclusion. Check the specific barrier requirements rather than relying on a product being labeled poultry wire.
Does the right mesh make the coop predator-proof?
No single mesh dimension proves that. Doors, latches, joints, the top, the base and the installation all require inspection.