Fit a coop weather cover only after checking the actual finished fabric dimensions, supporting arrangement, runoff, ventilation and access. A sheet that reaches the frame is not automatically a complete installation. Keep the daily care route and the secure animal boundary in view, and resolve any structural or attachment uncertainty before relying on the covering.
We may earn a commission when you buy through links on this page.
Define the weather problem first
Identify whether the proposed cover is intended to reduce wind-driven exposure, shed rain from a particular area or protect equipment temporarily. A side screen, an overhead cover and a permanent roof replacement have different requirements. Do not begin by wrapping every exposed surface simply because the largest tarp can reach it.
Mark the part of the enclosure that needs attention and the parts that must continue to function. Include ventilation openings, gates, service panels and the route to feed and water. A cover can interfere with those functions even when it looks neat from outside.
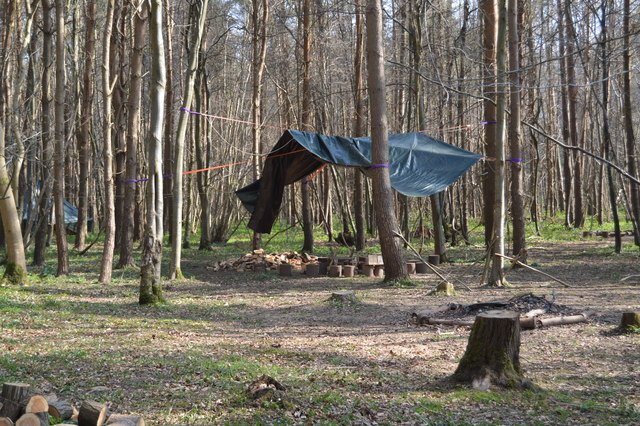
The opening photograph shows a woodland tarpaulin shelter suspended between trees. It provides context for the material, not a recommended coop structure, attachment method or safe load-bearing design. Use the worksheet below for the decisions that apply to the actual enclosure.
Pass three separate layout checks
Confirm the supporting arrangement
Identify the frame, wall or other structure that would support the cover and the applicable installation information. A tarp package does not certify the existing support or supply an engineered span. If its condition or capacity is uncertain, obtain appropriate qualified advice before installation.
Do not infer that a thin wire boundary, a loose panel or a convenient roof edge can serve as a structural attachment. Likewise, a stronger-looking rope or thicker sheet does not resolve the capacity of the object it connects to.
This guide provides a layout and checking method, not structural calculations, fastener spacing or a working-at-height procedure. A project that requires those decisions needs them resolved for the actual materials and site.
Measure the actual fabric route
Record the route the covering must follow, including the shape and any returns required by the applicable design. A flat floor footprint is not automatically the amount of fabric needed for a raised or sloped cover. Keep the attachment arrangement and finished fabric size as separate entries.
Our tarp comparison distinguishes nominal cut dimensions from documented finished sizes. The selected product’s label and instructions matter more than a convenient headline measurement.
For example, Kotap's TBG-0608 information gives a 6-by-8-foot cut label but a finished width of 5 feet 6 inches. For a hypothetical straight-width requirement of 6 feet, that is already 6 inches short before any other fitting allowance. Passing a simple width check would still not approve an installation; failing it identifies a purchase problem immediately.
Do not compensate for a failed size check by stretching the fabric to an unsuitable support. Resolve the actual layout and select the appropriate finished dimensions instead of treating the nominal label as an exact promise.
Sketch where the water will go
Trace the intended runoff from the covering to its destination. Check the edge near entrances, bedding, equipment and the normal walking route. Moving water off the top of a sheet is only part of the problem if it then concentrates at an inconvenient point.
Use the product instructions and an appropriate supporting design to resolve drainage and avoid pooling. This article does not specify a universal slope or an allowable water or snow load. A waterproof label does not establish that an unsupported flat sheet is suitable as a roof.
Do not climb onto the cover or an uncertain frame to inspect or clear an unresolved accumulation. Keep observations within safe access and use a qualified person when the task requires it. A temporary covering should not create an improvised roof-access routine.
Preserve the planned air path
Solid polyethylene tarps and open shade mesh are different materials. Adding a solid side or top can change how the enclosure exchanges air. Do not assume the word outdoor, weatherproof or breathable on another product describes the complete arrangement you are creating.
The University of Minnesota's cold-weather poultry guidance explains why ventilation and manure management remain important for moisture control. A cover should not be used to seal needed openings in an attempt to remove every trace of outside air.
Identify the existing ventilation plan and check that it still functions after the proposed change. This guide does not supply a universal uncovered strip, vent area or winter-wrap formula. If the housing arrangement is unclear, resolve that before adding more solid material.
Separate rain covering from shade
If the actual problem is sunlight rather than rain, revisit the material choice. The shade-cloth comparison covers open fabric formats with different rating language. They do not automatically provide a waterproof roof, while a solid tarp changes the covering arrangement in another way.
Do not rely on a color claim to predict a particular temperature underneath a cover. No cooling result is established by this worksheet. Check useful shade, airflow, water access and the actual management situation separately.
An enclosure may need both shade and wet-weather shelter, but one sheet should not be assumed to solve both jobs without appropriate documentation. State what each component is expected to do and what remains unresolved.
Keep the animal boundary independent
A general weather tarp is not a predator barrier. Preserve the suitable boundary material and its connections when fitting the cover. A continuous sheet can hide a gap without repairing it.
The wire and mesh comparison can help distinguish boundary materials from fabric covering. The attachment, opening size and complete joins still need to suit the housing; do not use a tarp’s weather-resistance claim as an animal-exclusion rating.
Inspect affected joins after the layout changes. Pay attention to any service opening or panel moved during the work, rather than checking only the new fabric surface. The full enclosure remains the relevant boundary.
Rehearse the daily care route
Before putting the new arrangement into routine use, check the normal feeding, watering, opening, closing and cleaning tasks. Can the caregiver reach the needed points without undoing an unidentified tie or leaving a door unsecured? Does loose fabric interfere with the service opening?
If the complete coop's access arrangement is already difficult, a cover can add another obstacle. Resolve that route deliberately instead of assuming the caretaker will work around it each morning.
Include the backup caregiver in the check. They should know which parts are intended to move, which must remain secured and which product-specific instructions apply. Do not leave them to judge a structural or weather rating from the appearance of the covering.
Keep inspection and removal instructions available
Retain the selected model, actual dimensions, installation information and care directions. Follow the applicable weather-handling and inspection requirements rather than inventing a universal service interval for every tarp.
After a change or a relevant weather event, check for unresolved damage, displaced material, blocked access or a changed runoff route within safe access. A cover that was adequate when installed can become unsuitable through wear or a change in the enclosure.
Record pending items clearly. If the support, ventilation or removal method is not resolved, mark it pending rather than approving the whole arrangement because the fabric reaches every corner. The useful result is a workable covering plan integrated with the housing and care routine.
Common questions
Should I use the tarp's nominal size to decide whether it fits?
Check the actual size basis and finished dimensions. Hemming can make a cut-size label larger than the delivered rectangle. Then resolve the real fabric route and the applicable attachment plan; a flat dimension alone does not approve an installation.
Can I close all gaps around a coop with a weather cover?
Do not obstruct needed ventilation or access. Identify which openings serve the housing plan and preserve their function. A weather cover is not a universal sealed-wrap instruction, and condensation is a different question from rain entering a gap.
Can a weather tarp replace the secure top or side boundary?
Do not treat a general tarp as a predator barrier. Keep appropriate enclosure materials, openings and connections as a separate system, and inspect any joins affected by fitting the cover.
Cover photograph by N Chadwick, CC BY-SA 2.0, via Wikimedia Commons. Contextual photograph; it does not identify a recommended product or certify the installation shown. Original planning diagram by Backyard Henhouse.
