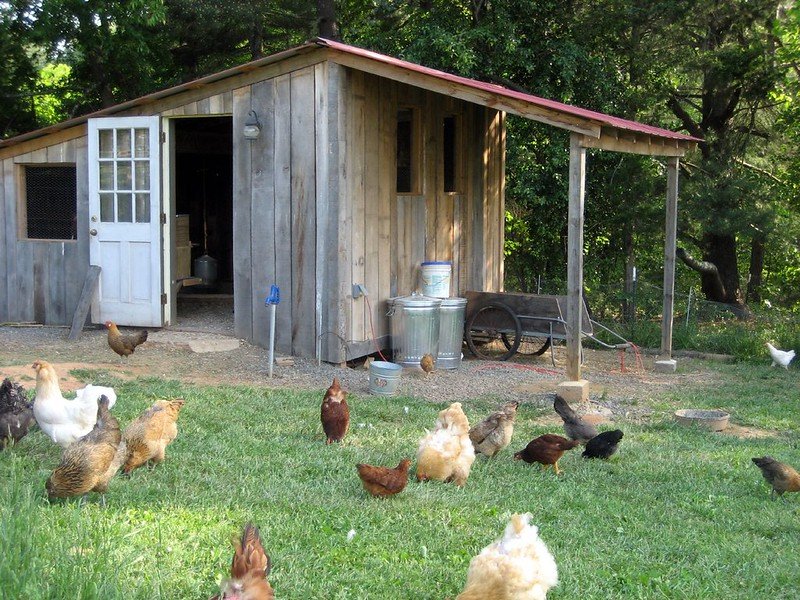
Before your chickens arrive, have a complete working housing, feeding, watering and cleaning setup, plus someone who can use it every day. Buy for the birds you are actually bringing home. Started pullets and adult hens need a different arrival plan from day-old chicks; an incubator is a separate hatching purchase, not an essential item for every new flock.
We may earn a commission when you buy through links on this page.
Use this checklist as a readiness check rather than a shopping total. A feeder still in its carton and a door that has not been closed with bedding on the floor do not count as working equipment. Put the ordinary care routine through a rehearsal before the delivery date.
Start with the birds, the site and the daily caregiver
Write down the number of birds, their age or life stage, and when they will arrive. Confirm those details with the supplier instead of assuming that every bird described as a young chicken has the same housing requirements. Ask what feed and care arrangements need to be ready for that stage.
Check local rules before committing to the flock or building. University of Minnesota Extension's backyard-chicken guide explains that permits and restrictions differ between communities. Its Minnesota discussion is not a statement of the requirements in every US city. Use your own local authority for the applicable rules.
Name the main caregiver and a backup. Make sure each can reach the coop, operate every closure, refill water and feed, and recognize when a condition needs attention. A working system includes this access and responsibility; it is more than a collection of purchased objects.
Check readiness in three passes
Housing: check usable space and access before accessories
Your first housing checks are shelter, usable space, ventilation, protection from predators, and access for care. The coop-equipment essentials guide explains the functions inside the building. Here, mark an item ready only when it is installed and usable in the actual arrangement.
Measure the enclosed area the birds can occupy, and record the run separately. Our chicken-space guide helps you distinguish the different spaces. A seller’s combined coop-and-run footprint is not automatically the usable indoor floor, and a headline bird count does not replace those measurements.
Walk the route for carrying supplies and removing used bedding. Open the cleaning panel fully. Check that a nearby fence, wall or stored bag does not block it. Reach the corners you will need to inspect without relying on a tool you have not bought or a panel you cannot safely remove.
For a purchased structure, compare those requirements with the documented limitations in our coop buying guide. Leave room in the plan for installation and care supplies. The smallest delivery carton is not necessarily the simplest housing to maintain.
Water: make it accessible, refillable and easy to inspect
Provide appropriate drinking equipment and a dependable refill routine. The Minnesota guide identifies continual access to clean, fresh water as essential. The readiness test is whether your actual birds can use the chosen arrangement and whether the caregiver can keep it functioning, not the largest capacity printed on a container.
Set the drinker in its intended location and follow its setup instructions. Check its support, fill access and any connections before birds depend on it. Look for leaks or spills reaching the bedding, and make sure a refill does not require dismantling an occupied enclosure or leaving an unattended entrance open.
Our waterer comparison separates containers and delivery formats. Use the exact product’s instructions for installation and suitability. A new nipple system, a different bird age, or an altered mounting position needs an actual usability check; recognizing a water container does not establish that every bird is drinking from it.
Do not turn nominal gallons into a guaranteed number of unattended days. Weather, spillage, contamination and equipment problems can change the usable supply. Plan inspection and a refill alternative rather than using the tank size to remove a daily care responsibility.
Feed: choose the correct ration and a usable feeder
Arrange suitable feed for the birds’ life stage before they arrive, and retain its label and feeding instructions. Minnesota Extension recommends prepared feed balanced for the birds’ nutritional needs. This checklist does not prescribe a ration, supplement dose or treatment; ask an appropriate poultry professional when the birds’ requirements are unclear.
Put the feeder where the intended birds can reach and use it, following the product’s setup guidance. Check support and refill access. If it has a treadle or moving lid, resolve the bird-size requirements and any introduction procedure before treating it as the only feed source.
Our feeder buying guide compares these operating differences. A covered container and a moving-door feeder solve different practical tasks. Neither a large hopper nor a rodent-resistant marketing phrase establishes that the installation will manage itself.
Include dry feed storage and a way to remove spills in the equipment list. Check the route from storage to the feeder and how the opened feed will be identified. Keep its instructions available for the backup caregiver rather than relying on a remembered scoop size.
Roosts and nests: prepare for the flock's stage
Check that the relevant perches and laying arrangements are installed, accessible and compatible with cleaning. Confirm the housing instructions and the birds’ stage rather than adding every accessory sold beside the coop. A laying-flock setup and a brooding area are different environments.
For hens approaching lay or already laying, examine the nest entrance, mounting and egg-collection route. A roll-away unit has its own floor and egg path; do not assume that loose floor bedding belongs inside it at the same depth. Our nesting-box comparison highlights those differences.
Open the collection panel as you will during ordinary care. Check that you can see and reach the relevant area and then close it securely. Do the same after installing liners or other specified parts. An accessory that prevents its door from closing needs correction before the birds arrive.
Cleaning and hygiene: give the routine its own equipment
Set aside appropriate cleaning tools, a container or route for removed bedding, and a clean reserve of suitable bedding. Keep the clean supply distinguishable from used material. Check where wet equipment will drain and dry; the kitchen sink is not a convenient substitute for an outdoor poultry-equipment cleaning arrangement.
CDC's backyard-poultry guidance calls for cleaning poultry equipment outside and washing hands after contact with poultry or their environment. Build those steps into the location and routine. Keep footwear and supplies organized so the caregiver can follow the plan consistently.
Prepare a written care sheet with the feed label, equipment instructions, refill locations, closure sequence and contact details for appropriate help. Do not fill it with medication guesses. Health concerns belong with a veterinarian; a checklist cannot diagnose the flock or tell you which treatment to buy.
Separate essential readiness from conditional purchases
Day-old chicks require a brooding plan appropriate to their age, including suitable environmental control, feed and water arrangements. University of Missouri Extension's brooding guide covers that separate stage. Do not bring chicks into an adult-hen setup and assume the presence of a coop resolves their needs.
An incubator is conditional on a deliberate hatching project. Automated doors, remote cameras, extra storage and specialized egg-handling accessories are also decisions tied to a particular task. Decide which function each would provide before treating it as an essential first-day purchase.
Seasonal equipment deserves its own check before the relevant weather, with the exact product’s power and installation instructions. Do not improvise electrical connections, add a heater solely because it appears on a shopping list, or assume that automation replaces inspection. Ask for qualified help where the installation requires it.
Run a rehearsal and keep a short unresolved list
Start at the feed store and work through a normal visit: carry supplies, enter, refill, inspect the floor and equipment, collect an egg if appropriate, remove waste, and close every opening. Have the backup caregiver repeat the relevant operations. Record any part that is blocked, unclear or dependent on a missing component.
For example, a hypothetical four-pullet arrival can still fail readiness if the cleaning tray cannot slide out beside the fence, the only waterer leaks, or the caregiver cannot operate a keyed gate. Buying a second decorative accessory will not resolve those particular gaps. Move the obstruction, correct the water system and establish access before marking the setup ready.
Keep the final list practical: item, location, setup completed, person responsible and unresolved action. Separate essential corrections from later conveniences. The useful finish line is a complete care routine for the actual birds, with a backup and the instructions available.
Common questions
Do I need an incubator to start keeping chickens?
No. An incubator belongs to a hatching plan. If you are obtaining started pullets or adult hens, prepare their housing and care arrangement instead. If you obtain chicks, plan for brooding; that is a different requirement from incubating eggs.
Does a large feeder or waterer let me skip care visits?
Nominal capacity does not establish an unattended interval. Check actual access, operation and condition, and maintain the care routine. A blocked outlet, leak or contaminated supply can make the advertised storage size irrelevant.
What should I buy before optional accessories?
Complete the working housing, feed, water, cleaning, hygiene and caregiver-access arrangements for the birds' stage. Rehearse those tasks and correct unresolved essentials. Add optional equipment when you can name the specific job it will do.
Cover photograph by Open Gate Farm, CC BY-SA 4.0, via Wikimedia Commons. Contextual photograph; it does not identify a recommended product or certify the installation shown. Original planning diagram by Backyard Henhouse.
